I’ve been using the Pen cameras pretty much continuously since the E-P1 was introduced, in the summer of 2009. Since I do a lot of travel and outdoor photography where camera size and weight are a concern I appreciate the small size and minimal weight of the Pen cameras. Even the Olympus Micro Four Thirds lenses are smaller. Because the Four Thirds sensor is smaller than an APS-C sensor (Sony NEX and Samsung NX mirrorless cameras) and Olympus applies image stabilization at the sensor and not in the lens, they’re able to keep the lenses much smaller than their competitors. That means a Pen camera system with multiple lenses will be smaller than a comparable Panasonic Micro Four Thirds or Sony NEX camera system.
On the surface the E-P3 looks very similar to the E-P1 and E-P2 but there are a couple of subtle differences that I think really improve the camera experience. It’s got the same retro styling and separate aperture and shutter speed control dials but I think the E-P3 exposure control dials have a much smoother feel. I also like the new lower-profile mode dial. The E-P1 and E-P2 dials felt a little rough to me and that affected the overall camera experience for me. Not so with the E-P3. It may look the same as the older Pen cameras but everything about it feels better. I mostly used aperture priority or shutter priority manual modes with the E-P3. But it’s got a full range of shooting modes including iAuto, 23 scene modes and the user friendly Live Guide interface to help beginners achieve the same kind of blur and action effects as pros. Check out the Olympus E-P3 intro video below for a hands-on look at the camera and a field demo with Olympus Visionary Jay Kinghorn and professional rock climber Justin Wood.
Olympus E-P3 Pen Camera Intro Video:
Another feature I think really improves the E-P3 is the 3-inch OLED display. I had mixed feelings about the touchscreen controls but the OLED image quality is beautiful. Images on the screen look so bright, sharp and snappy that checking and sharing images on the camera becomes a real pleasure. To be honest, this is an experience that’s hard to convey in print. To really understand the difference the OLED display makes, I recommend you take a hands-on look at the E-P3 or another camera with an OLED screen to see what I mean. The bottom line is the OLED display makes using the E-P3 a much more enjoyable experience and that makes you want to use the camera more. It even has an anti-fingerprint coating that really works!
I have mixed feelings about the E-P3′s touchscreen display. It works well but I think it’s not for everyone. There’s a touchscreen demo about 3 minutes into the intro video, above. Two of the main benefits are being able to focus and take pictures by touching your subject on the screen. With 35 focus points arranged over almost the whole display you can focus a lot more precisely than before. Unfortunately, the touch shutter doesn’t work very well for me. Well, actually it works fine but I found I can’t hold the camera steady while I use it. I either end up with motion blur because the camera moves, or my composition gets screwed up. So even though it’s a cool feature, I ended up going back to the trusty old shutter release button, which never fails me.
But my main problem with the touchscreen was I ended up taking way too many photos with my belly. Sounds strange, huh? Think about it – with the camera on a strap around your neck, bouncing against your stomach, the touch shutter is going to be triggered and you’re going to end up with a bunch of sweet photos of your shoes. To avoid the shoe photos you either have to turn of the touchscreen controls or turn off the camera. Once I determined I’m more comfortable with traditional camera controls I turned off the touchscreen display. To be fair, the touch shutter and touch focus features work well. They just aren’t for me. I’m sure there are people out there who will absolutely love them. One thing I do love about the touchscreen is scrolling through my photos by “swiping” the display iPhone-style. That is a sweet feature and one I would love to see on all cameras.
Now that we’ve gotten through some of the feature and design stuff, we can talk about why I really like the E-P3 and. I think the Olympus Pen system is perfect for travel – offering the best balance between size, weight and performance. That’s why I took the E-P3 on my honeymoon in Europe this summer. The whole kit, with four lenses and the body, covering a focal length range of 18 to 300mm (35mm / full-frame equivalent), was about the size of a prosumer digital SLR (Canon EOS 60D or Nikon D7000) with an 18-200mm zoom lens. Check out the video below to see the kit and how I carried it.
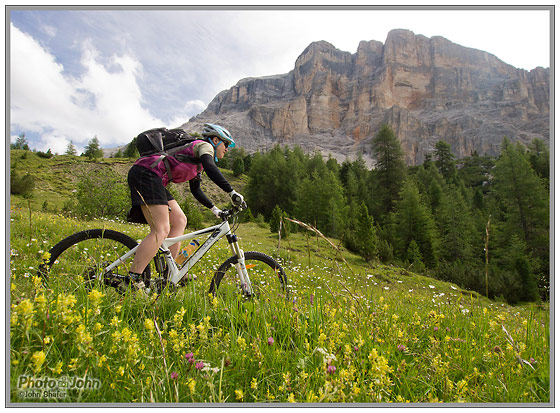
A year ago I took the Olympus E-PL1 on vacation to Mexico and was really pleased with the image quality and how well it traveled (Olympus E-PL1 Pro Review). At that time I said I wouldn’t take a Pen camera on a trip if I was going to be shooting sports. But mountain biking was definitely part of the plan for our Italian honeymoon and I was a little worried about how well the E-P3 would perform. Turns out I had nothing to fear. With a couple of new lenses and the E-P3′s improved high ISO performance I got great mountain bike action photos in Italy. On the trail, I packed the Olympus 14-150mm and 9-18mm Micro Four Thirds lenses. They gave me an awesome zoom range of 18 to 300mm (35mm equivalent) and together they’re only about the size of a can of Red Bull.
Although the E-P3′s single shot auto focus is excellent (it was the fastest on the planet when the camera was announced), the continuous auto focus still isn’t that great. So using good action shooting technique is critical. I’d stop Mrs. Photo-John (aka Photo-Jenic) at a good spot on the trail, tell her what I wanted, pre-focus on the spot where I wanted her in the photo and shoot a burst to get the shot. The only problem I had was the E-P3′s 3 frames-per-second max burst rate is too slow for serious sports shooting. It usually takes two or three tries to get the photo the way I want. At one spot I had Jenni ride through five or six times trying to get the timing right and then finally gave up. If the camera could do 5 FPS I wouldn’t have had any trouble at all. Still, my original concerns about not being able to get action shots with the E-P3 were totally unfounded. By using proper technique (plan the shot and pre-focus), I had no trouble getting great mountain bike action photos of Jenni with epic Dolomite Mountain backdrops.
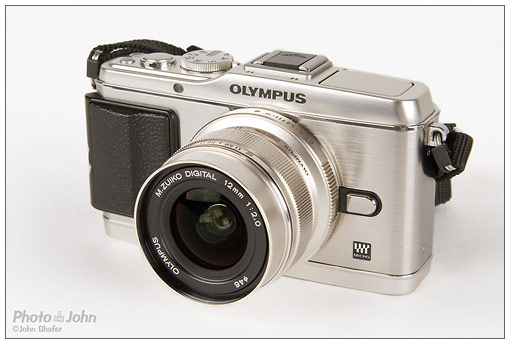
For standard travel shooting – landscapes, street photography, people photos, etc. – the E-P3 is a no-brainer. The image quality is solid up to ISO 800, it’s easy to carry, inconspicuous and the 14-150mm zoom (28-300mm equivalent) is great when you only want to carry one lens. For street shooting in the evening I like the 12mm f/2.0 prime lens. The fast f/2.0 aperture lets in a ton of light and the wide 24mm (equivalent) focal length works well for candid portraits and street photos – it even has a focus guide for hyperfocal and zone focus shooting! It doesn’t hurt that the Zuiko 12mm f/2.0 is also a very handsome lens. [photo of camera with 12mm lens] I also carried the 17mm f/2.8 pancake lens. It was good for portraits of my new wife at dinner and it’s tiny so you can just drop it in a pocket. With one of the small primes mounted on the E-P3, I could comfortably carry it under my arm on the shoulder strap so it was always there when I wanted it. Olympus also added a low light focus assist light to the E-P3 and it makes a huge difference when you’re focusing in very low light.
Reviewing my photos at home I noticed there were a lot of images that were less than 100% sharp. I confess I have a bad habit of pushing my luck with slow shutter speeds. Combine that with the E-P3′s lack of eye-level viewfinder and you’re going to get a lot of photos that suffer from camera shake. I actually have the optional EVF (electronic viewfinder) but I didn’t use it in Europe. That was a mistake. One of the most important things about an eye-level finder is it provides a third point of contact for the camera, steadying it and allow you to safely use slower shutter speeds. If I had taken the time to use the EVF I would have saved a lot of photos. The EVF is also great for shooting in bright sunlight where it’s hard to see the LCD (although the E-P3′s OLED display is much better in sunlight than most) and it helps smooth out handheld video. It’s a very worthwhile accessory to have.
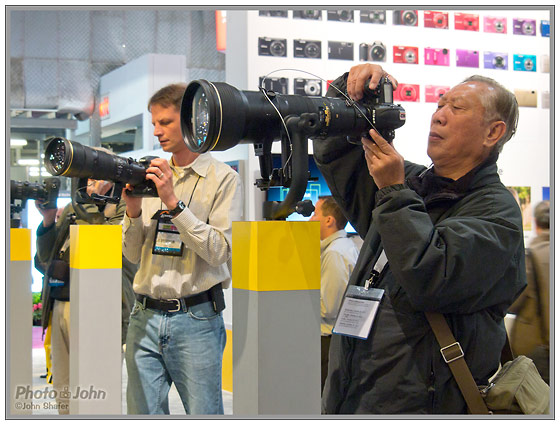
Besides travel and action, I also shot a couple of tradeshows with the E-P3. I took it to the tradeshows for pretty much the same reasons I took it to Europe. The small, light body is easy to carry and the 14-150mm zoom lens can do it all. The tradeshows were arguably the ultimate test for the camera. They have the worst possible lighting conditions with terrible white balance and very low light. I shot at ISO 800 and even 1600 and then pushed my photos *very* hard in post processing and for the most part I am very happy with how well the E-P3 performed. You can see most of those photos in my 2011 PhotoPlus Expo articles.
Next – Olympus E-P3 Image Quality >>
| Olympus E-P3 Review Navigation | ||||||||||||||
|
||||||||||||||


Nice interview!! Here are some moere test shots with the 12mm 25mm and 45mm!!
http://www.flickr.com/photos/timvanvliet/sets/72157627295087905/
Greetz.