I’ve updated this Fujifilm X-E1 studio sample photos page (again) with a new set of images made using Adobe’s Lightroom 4.4, which was released a just couple of days ago. Normally a Lightroom software update doesn’t make any difference for previously made sample photos. But one of the changes in Lightroom 4.4 was improved RAW processing for Fujifilm X-Trans sensors. I decided I should take a look and lo and behold, there was a clear difference between my first Fujifilm X-E1 studio samples converted with Lightroom 4.3, and those converted with Lightroom 4.4. Because of the new sample photos I’ve re-analyzed the Fujifilm X-E1’s image quality and pretty much rewritten this whole article. So if you read it when it was first published, you’ll probably want to read it again.
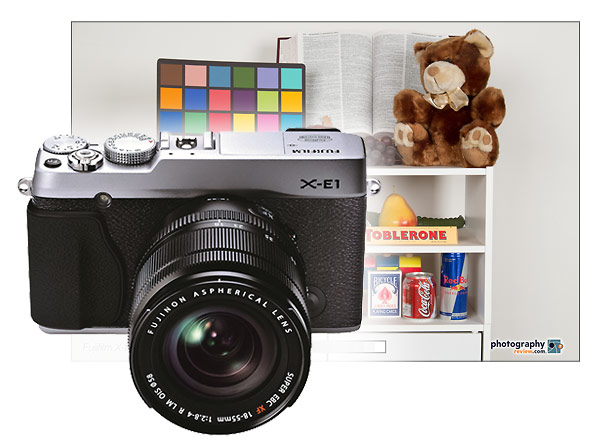
The Fujifilm XE-1 is an X-Pro1 Lite. It gives up a few features and a bit of sex appeal to bring the price down about $700 so normal people can afford it. The important thing is, the X-E1 uses Fujifilm’s renowned 16-megapixel APS-C X-Trans sensor, just like the X-Pro1. So you can save a nice chunk of change and still get the same image quality with the X-E1 as you would with the X-Pro1 (learn more about the Fujifilm X-Pro1).
I’ve seen the image quality from Fujifilm’s X-Trans sensor compared to full-frame cameras and that’s actually a bit of a push. Compare our Canon EOS 5D Mark III sample photos to the X-E1 samples below to see if you think the X-E1 is that good. But even if it doesn’t match full-frame quality, the X-Trans sensor is still quite remarkable. Fujifilm took the traditional Bayer sensor array design, broke it up into nine-pixel grids and then randomized the individual red, green and blue pixels in each grid. That allowed them to remove the anti-aliasing filter that most cameras use to eliminate moiré patterns. No anti-aliasing filter allows more light can reach the sensor for better low light photos. It should also allow the sensor to capture more detail.
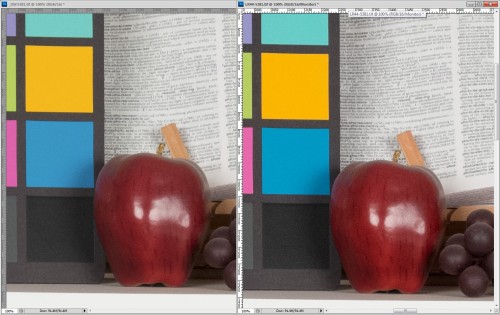
I’ve shot a lot of photos with the X-E1 now, from architecture to party photos to landscapes. The main thing that stands out for me is the X-E1’s subtle tonal blends, indicating great dynamic range – especially in the highlights and lighter areas. Those soft, subtle highlights make a real difference for portraits and photos that prominently feature snow and sky. One thing I didn’t pay much attention to when I originally published this article, was the quality of fine details and sharpness in my X-E1 images. To be honest, my original RAW conversions, done with Lightroom 4.3 had about the same level of detail and sharpness as I have come to expect from APS-C sensor cameras, so I didn’t think much of it. However, without an anti-aliasing filter, the X-E1 really should produce sharper, more detailed images and I should have asked myself why they weren’t sharper. The good news is, after updating to Lightroom 4.4 and comparing RAW files converted with both versions of Lightroom, the images are, very clearly, sharper. I think the color is also a little more accurate, with better neutral tones, too. The increased sharpness is the important change though, and its best illustrated by looking at the dictionary text in the studio test photos. The image below is a screenshot of our ISO 1600 X-E1 studio sample photo viewed at 100% in Photoshop. The original, Lightroom 4.3 conversion is on the left, and the new conversion, made with Lightroom 4.4, is on the right. The text in the new conversion is clearly sharper.
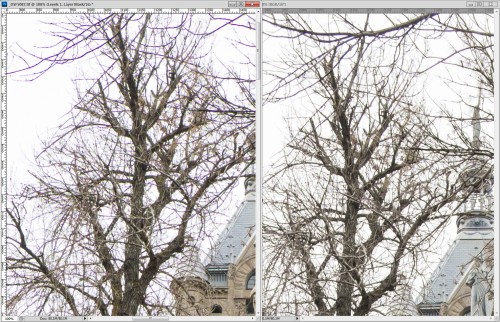
A serious purple fringing problem I noticed in some photos has also disappeared. You can see the difference in the tree branches, below. The purple fringing in the original version of this image (left) was so bad that it gave the whole sky a blue / magenta cast. Thankfully, the purple haze is completely gone in the new conversion, made with Lightroom 4.4 (right).
In most of my real world images, the improved Lightroom 4.4 RAW conversions don’t make a really noticeable difference. The one exception is the image with the tree branches and purple haze (above). I replaced the original of that one in my X-E1 sample gallery with a new, cleaner image made from a Lightroom 4.4 conversion. Click on the photo below to see all of my Fujifilm X-E1 real world sample photos.
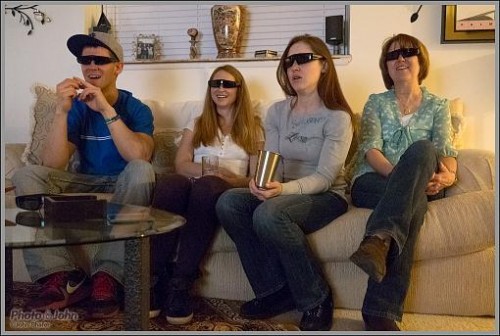
The X-E1 studio sample photos below generally confirmed my impressions from the first day out shooting with the camera. The studio tests have smooth, rich tonal blends but still have nice contrast – and with the updated Lightroom 4.4 RAW processing, they are noticeably sharper – especially fine details. The X-E1’s wide dynamic range leaves a lot of room for adjustment in post. Noise does become visible at ISO 800 when viewed at 100%, although it isn’t unpleasant noise, nor will it be visible at normal viewing sizes. It’s not until ISO 6400 that the noise starts to get a little chunky and out of control. And even at ISO 6400 I think the X-E1 should be useable for most subjects, with proper exposure. I found the limit with an ISO 6400 group photo pushed over a stop in post processing (see photo, below). For reference, I also compared the Fujifilm X-E1 studio tests to tests I made a few weeks ago with the Sony NEX-6, another current camera with a 16-megapixel APS-C sensor. That’s an interesting comparison because it shows how organic and film-like the X-E1 noise is. The Sony NEX-6 noise, on the other hand, looks a little smeary – even too smooth, like it’s been digitally touched up before being saved (Sony NEX-6 studio sample photos). Comparing to the NEX-6 also shows off the sharpness of the X-E1’s anti-aliasing-free sensor (with the updated Lightroom 4.4 RAW conversions). I think the NEX-6 is great but after comparing the studio tests from both cameras, I definitely like the Fujifilm X-E1 better.
Enough of my analysis – it’s time for you to do your own pixel peeping. The Fujifilm X-E1 sample photos directly below are the new ones, made with Lightroom 4.4. The original samples, made with Lightroom 4.3, can be found on the next page, if you want to compare the old and new samples yourself.
With the exception of the expanded sensitivity images (ISO 100, 12,800 and 25,600), the Fujifilm X-E1 studio sample photos below were shot RAW in aperture priority mode with the Fujinon XF 18-55 OIS zoom lens at f/8 and white balance on the tungsten preset. The ISO 100, 12,800 and 25,600 expanded sensitivity tests were taken in JPEG mode since those settings aren’t available for RAW shooting. The files were all converted to 16-bit TIFFs in Lightroom and the graybar, text and logo were added in Photoshop before they were resaved as maximum quality JPEGs. No adjustments were made and no sharpening or noise reduction were applied. Please feel free to view and compare these sample photos as you see fit. I recommend making prints in order to equalize resolution differences between cameras and avoid getting distracted by noise at 100%.
Warning: these files are big – be patient while they download.
New Fujifilm X-E1 Sample Photos From Lightroom 4.4 RAW Conversions
 New Fujifilm X-E1 ISO 100 Sample |
 New Fujifilm X-E1 ISO 200 Sample |
 New Fujifilm X-E1 ISO 400 Sample |
![]()
 New Fujifilm X-E1 ISO 800 Sample |
 New Fujifilm X-E1 ISO 1600 Sample |
 New Fujifilm X-E1 ISO 3200 Sample |
![]()
 New Fujifilm X-E1 ISO 6400 Sample |
 New Fujifilm X-E1 ISO 12,800 Sample |
 New Fujifilm X-E1 ISO 25,600 Sample |
![]()
Fujifilm X-E1 Gallery >>
Fujifilm X-E1 Intro >>
All Digital Camera Sample Photos >>
Related Content:
All Fujifilm User Reviews
All Digital Camera User Reviews
Compact System Cameras (Mirrorless) Forum
More Fujifilm News & Articles
Fujifilm Web Site
All Digital Camera Pro Reviews
All Digital Camera Studio Sample Photos


Leave a Reply