 Author’s note: I am pleased to be able to provide you with an exclusive excerpt from my most recent Focal Press book, Photographing Flowers: Exploring Macro Photography with Harold Davis. The subject is exposure, specifically exposure in flower photography. My hope is that these two sections of my book, and the photographs that illustrate the techniques that I explain, will help you better understand how to work with exposure histograms and exposure settings to create exciting floral imagery. The good news is that what you learn will translate to better exposures in most areas of photography, not just when you are shooting flowers. Enjoy!
Exposure and Flowers
When it comes to photography, exposure is a big topic. There are plenty of books that explain exposure in great detail (I’ve even written some of them!). So I’m not going to cover the entire topic of exposure, but I will explain what you need to know to photograph flowers up close and personal. Light is transmitted or reflected from your subject, enters your camera through the lens, and is recorded by your sensor. Your exposure settings are used to manage this rush of light and help translate the light into a file that can be recorded.
This relationship between incoming light and your camera settings is sometimes referred to as an equation, because the two need to be in some kind of balance. Think of it this way: if you change the exposure settings to let more light in, your photo gets brighter; but if you let less light in, the photo gets darker.
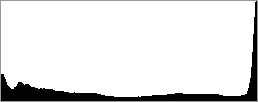
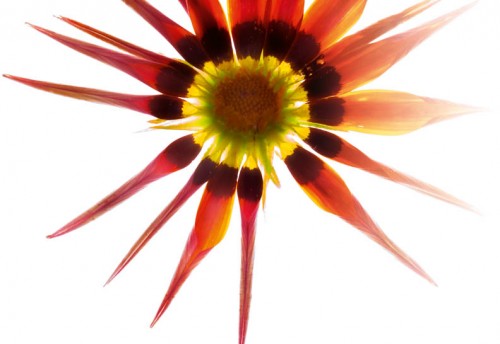
My idea when I shot this image of a gazania (above) was to present the petals of the flower isolated on a whiter than white background, shown as the spike on the right side of the histogram below. If you only went by the exposure histogram, this image would seem to be overexposed — but in fact it is exposed exactly as I intended. Photo: 200mm macro, 8 seconds at f/36 and ISO 100, tripod mounted
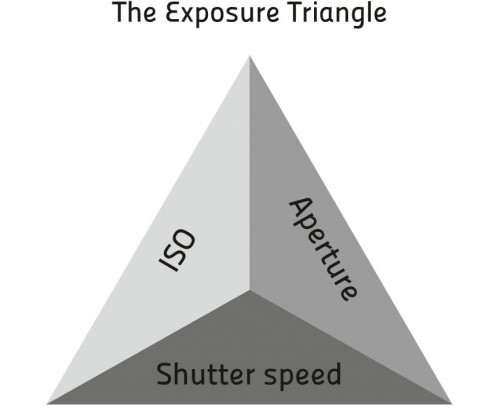
The three settings that you can use to control exposure are shutter speed (the length of time the shutter stays open letting in light), aperture (the size of the opening in the camera’s lens), and ISO (the sensitivity to light of the sensor). These three settings are often depicted as a triangle as shown below. If you change one setting, then to keep the amount of light hitting the sensor in balance, you also have to change another setting in a countervailing direction.
The Exposure Triangle
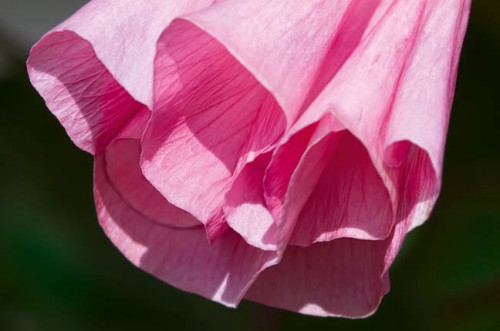
When I spotted this tiny mallow in the process of unfurling, the flower immediately reminded me of pink silk fabric. With my telephoto macro lens on my tripod, I had to wait for the breeze to die down before I could take a photo showing the crisp lines on the petals.
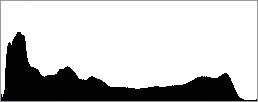
Although I shot this photo at midday, it is essentially a midtone image. While parts of the flower are quite bright, there are no real highlight blowouts and no areas that are totally black. The flower is predominantly midtone as you can see from the histogram shown below. The small mountain on the left of the histogram represents the dark green background.
Photo: 200mm macro, 36mm extension tube, 1/30 of a second at f/16 and ISO 100, tripod mounted
One morning while shopping at my local grocery store, I found a lovely bunch of red roses. So I quickly checked out, leaving the food behind, and brought the roses home.
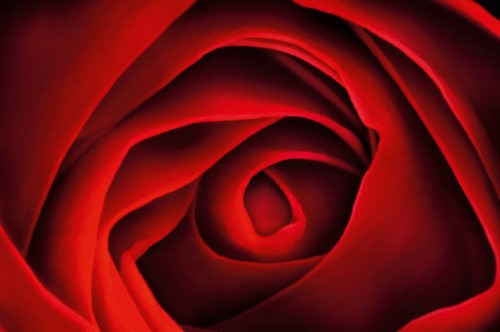
After getting my equipment together and setting up a mini-studio outside on my front porch, I positioned this red rose in a vase so the light source (in this case the sun) went obliquely across the top of the flower. That way, it created deep shadows between the petals.
I controlled the light by positioning some sticks in front of the flower. My idea behind this photo was to create a vast contrast between the light and dark areas.
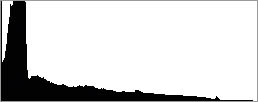
You can see this in the exposure histogram shown below. Since this is a low-key image, dark tones predominate. This is represented by the mountain on the left side of the histogram with a spike on the far left where the image is completely black. The histogram does trail to the right, showing that there are also some bright values in the photo.
Photo: 200mm macro, 24mm extension tube, 1 second at f/36 and ISO 100, tripod mounted
Determining the Right Exposure
Taken individually, it is not hard to understand the impact of each of the three exposure settings (shown in The Exposure Triangle): Shutter speed determines the length of an exposure, and therefore impacts the rendering of motion and whether or not you need to use a tripod to hold the camera steady. Aperture controls depth-of-field and the range of subject matter that is in-focus. The sensitivity to light, ISO, can be dialed-in on a per-frame basis. The higher the ISO, the less light you need to make your photo—and the more noise, which is visual static, you’ll find in the resulting image.
If you leave your camera on automatic, it will use software both to analyze what you are shooting and to come up with the best settings. Unfortunately, automatic settings usually don’t give you the best results. This is because striking flower images aren’t derived from averaging the light in the scene in front of you.
Most good flower photos work by exposing for specific, important areas of the photo rather than the overall average — and there’s really no way your camera can tell which parts of the flower or garden are important. A very important part of the creativity in flower photography comes from making this decision about exposure, and you shouldn’t leave this up to the software in your camera if you want good results.
Almost all my flower photos are taken using manual exposure. Once I get my camera off automatic, I do use the camera’s light meter reading as a starting place for my exposures.
I tend to prefer to slightly underexpose my flower photos. It turns out that this is a surprisingly controversial way to proceed because a great deal of the information in a digital capture is in the brighter end of things. However, in post-processing you can recover a great many things, but you cannot restore areas that have been blown out — which naturally leads to underexposure. In addition, I’ve found I get more colorful photos when I slightly underexpose.
With the camera set to manual exposure, I use the camera to come up with a starting exposure. With flower photography, I’ll usually set the ISO for best quality — to 100 or 200. I’ll then set the aperture depending upon how much depth-of-field I want. Finally, I’ll set the shutter speed as suggested by the camera, and then adjust depending upon the results. By the way, this process would probably differ if the flowers are in motion because I might well choose my shutter speed before my aperture depending on how I wanted to handle the motion. Using a faster shutter speed would freeze the motion, and a slower speed would blur it. In either case, I’d need to pick my aperture to complement my choice of shutter speed.
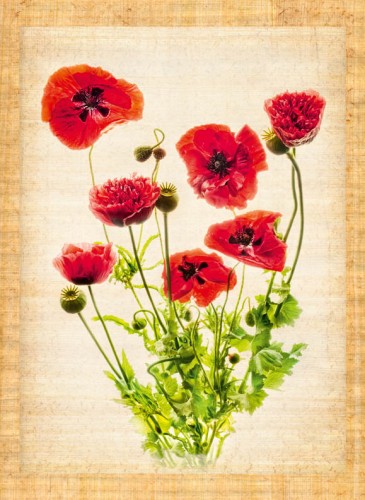
To photograph this bouquet of fresh-cut poppies I laid them on a light box and combined several exposures—all of which were “overexposures” according to the camera’s light meter. To finish the image, I added a textured background in Photoshop. Photo: 85mm macro, five exposures combined in Photoshop, exposures at shutter speeds between 1/2 of a second and 8 seconds, each exposure at f/21 and ISO 100, tripod mounted
To review my initial exposure settings, I check the LCD and adjust accordingly. However, the LCD doesn’t tell the whole story, and can often display an image inaccurately. You should also learn to take the exposure histogram into account as you adjust the exposure settings in a flower image.
Neither the camera viewfinder, nor the LCD, nor the histogram can tell you how to expose. These tools only provide data points. It is up to you to decide based on your experience, intuition, and compositional decisions about the photo how you want to expose.
Good flower photography conveys emotion, and makes effective use of color and contrast. Most of all, there is a visual idea behind every photo that works. Is this a flower reproduced on a bright, white background, a brooding dark image, or a floral composition in which some elements can be seen and others are cloaked in shadow?
Your exposure should support your idea, and the emotionality and color values within your image. Only you can determine the idea you have in mind — and what exposure values will create the visual impact that will best support it.
Photo: 50mm macro, six exposures combined in Photoshop, exposures at shutter speeds between 1/8 of a second and 4 seconds, each exposure at f/14 and ISO 100, tripod mounted
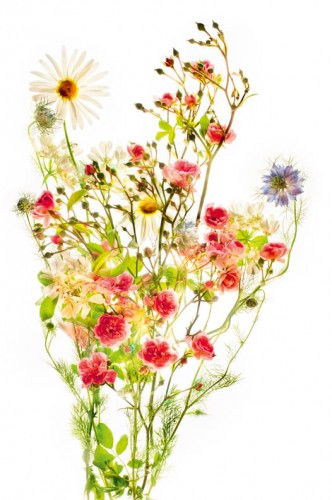
I happily cut these flowers from our garden. The bouquet includes daisies, love-in-a-mist, and faerie roses. Then I placed the flowers on a light box, with the idea of creating a highkey, dreamy image with elements that might seem overexposed.
About Harold Davis:
Harold Davis is an award-winning professional photographer whose work has been widely published and collected. He is the author of many best-selling books about photography, Photoshop, and digital art, including The Photoshop Darkroom series and Photographing Flowers: Exploring Macro Worlds with Harold Davis from Focal Press. Harold’s photography blog, www.digitalfieldguide.com/blog, is read by more than 25,000 visitors each month. His latest book from Focal Press is Photographing Flowers: Exploring Macro Worlds with Harold Davis ($29.95). His next book, Photographing Waterdrops: Exploring Macro Worlds with Harold Davis ($29.95), is currently available for pre-order and will be available in June 2012.
All photos copyright Harold Davis














I need help on the picture style. I use the Canon T2i.I have been told many times by many poeple to use Superflat when shooting. But, when I used that setting, everything was really washed out. No colours. I know it can be fixed in post, but should it really be that washout out?I’ve seen some use Neutral but, it looks the same as Standard. So, should I use Superflat? For indoors/low light, its good. But, even for outdoors too?*It helps with getting more detail, but image is washed out.
Dear Yaya, It’s perfectly reasonable to want your photos to come out well. But often we have no idea what the (sometimes oddly named) exposure modes actually do. I mean, I’d suspect that a mode called “superflat” probably flattens and washes things out, but who really knows?
The bottom line: you are smarter than the computer in your camera, and smarter than any exposure mode. I recommend that photographers who want to improve their work learn to shoot in fully manual exposure mode. Once that has been mastered, then very selectively you can go back to exposure modes.
Note also that if you save your files in the RAW format many issues can be resolved when they are converted.